
As I mentioned in Part 1 of the Shooting Modes Edition, I intended to write a post about all the photo-taking modes available on the iPhone. It turned out to be a novella-size post, so I thought it best to focus on them one at a time. So here we are in Part 2:
Live Mode
A Live Photo is a 3-second mini video that brings your photo to life. Waterfalls, surf lapping onto a beach, rapids, most movements can be turned into a wonderful long exposure photo. You can also repeat the action in your photo by applying the Loop or Bounce features.
If I can do it, you can too
Taking a Live Photo is easy. Like it says in the fancy paragraph header: if I can do it, so can you.
First step – Open your camera and turn Live on. The Live switch can be found at the top of your screen. You’ll know it’s on when a little yellow sign comes up with Live. (When you turn it off, the sign will pop up in white and say Live off) . You’re ready to go.
Second step – Aim your phone at the subject. The trick is to hold your phone still for a couple of seconds before and after you take the photo. When you go back to check your image, you’ll notice the image moves slightly.
Special Effects
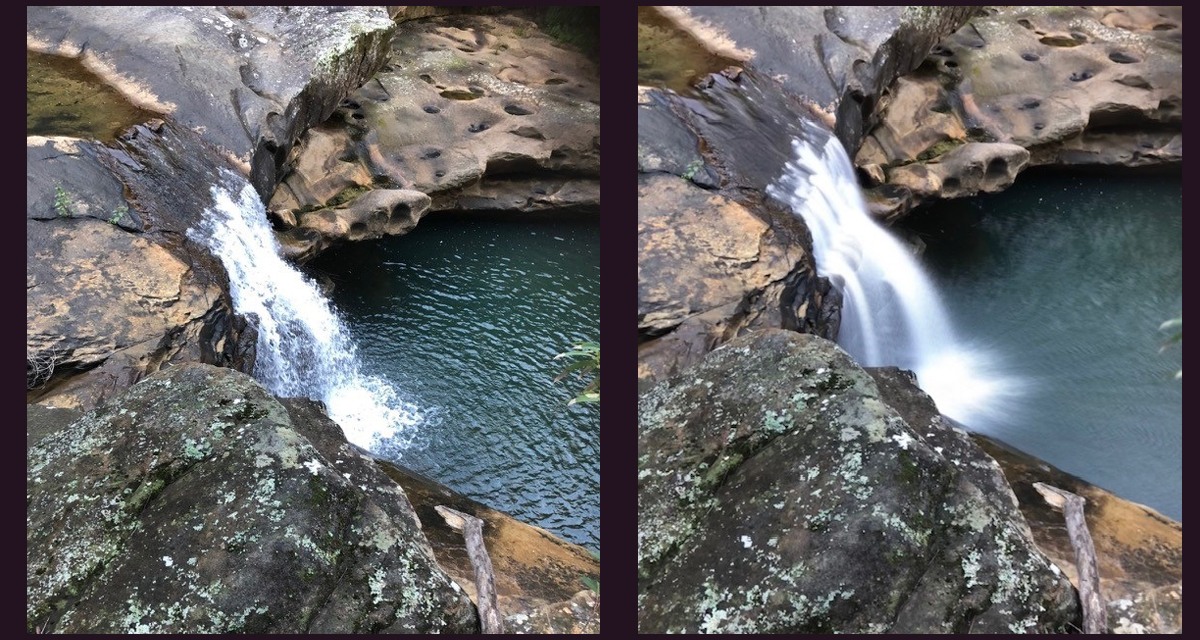
Third step – Slide your image up. Just the image, not the whole screen. A whole bunch of options becomes available: Loop, Bounce, Long Exposure. Test them out with your image. Loop – If you have taken a photo of a waterfall, for example, the 3-second video becomes a continual repeat; Bounce – The waterfall goes backward and forwards; Long Exposure – Creates a blurred solid effect. (As shown in the photo above.) To swap effects, slide the image up again as you did in the beginning.
A couple of extras – 1. Live photos can also be edited with the iPhone’s software without affecting the Live mode. 2. As with any of the Photo modes, for quick find, there is a Live Photo album. You’ll find it in Albums, scroll up to Media Types.
Tip – As I mentioned in Part 1 – Portrait mode, it’s a good idea to make a duplicate of your original before adding effects to it. That way you have a raw image to try other effects with.
A final word, or two…
When I first found out about the Live mode I was amazed. I could create images without having a ‘real’ camera. When I showed friends the photos I’d taken and edited using Long Exposure, they couldn’t believe I’d used a phone to take the photo. It sounds like an advertisement for some crazy gadget, I know, but it’s true.
Have fun creating awesome shots. Next post will cover how to zoom correctly. If you follow my blog you will be notified when the next post is available. Until then, stay safe – cheers.